


How to Roll the Perfect Joint Every Time

A well-rolled joint is a thing of beauty. Firm and sturdy, with no lumps or air pockets. Well-sealed from tip to twist for an even burn.
Getting there is simple. But that doesn't mean it's easy.
These rolling tips and step-by-step instructions will help you perfect your technique, whether you're a total beginner or a seasoned joint artist.
Essential Tools for Rolling the Perfect Joint
Before you can roll the granddaddy of all joints, you need the proper supplies.
Properly Dried & Cured Cannabis Flower
The quality of your burn has everything to do with the quality of your cannabis flower.
It has to be properly dried to remove humidity and moisture. But it can't be overly dry, or you risk losing those sticky little trichomes that are packed with cannabinoids and terpenes.
Your weed also has to be well-cured over several weeks to further reduce moisture content and mellow out harsher flavors. This process helps develop terpenes, giving you a more potent product.
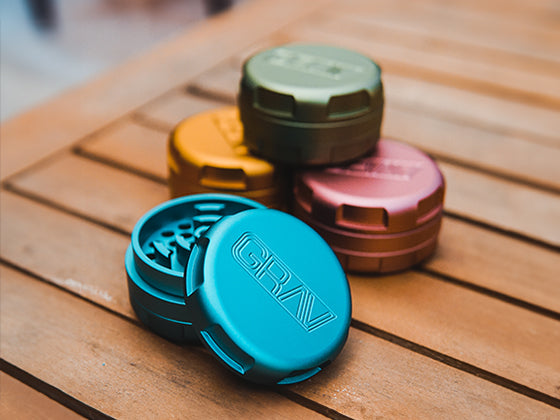
A Quality Cannabis Grinder
To burn smoothly, a joint needs weed with an even consistency. That means you need a good herb grinder.
Look for small, sharp teeth that tear through cannabis flower smoothly, without getting stuck. It should be easy to grip, and come in a durable material so it can stand up to hard work.
The GRAV 3-Piece Grinder has 19 aluminum teeth to get those nugs rolling-ready. When flower is small enough, it will fall through the holes into the collection chamber below. This grinder is made of CNC-machined aluminum, and comes with an aluminum scraper so you can scoop up every last bit.


Rolling Papers

There's no single best rolling paper out there for every smoker. Different folks will have their own favorites, from eco-friendly hemp to neutral flax to sturdy wood pulp. Here's what you should know.
Types of Rolling Papers
Rice Rolling Papers: Rice papers are thin and strong, with a slow burn and mild taste profile. But because they're so thin, they can be tricky to roll and are best for experienced joint rollers.
Hemp Rolling Papers: Hemp has lower water needs than rice or flax, making it a more eco-friendly option. It is a bit thicker, but still burns pretty evenly. Some users find that hemp papers can give them a scratchy throat.
Wood Pulp Rolling Papers: Wood pulp is a classic rolling paper material. These papers are sturdy and easy to roll—great for beginners! Plus they burn slowly and evenly.
Flax Rolling Papers: Flax is derived from the linseed plant. It's strong but thin, with a neutral taste and consistent burn. Because they're so thin, they can be challenging to roll.
Sizes of Rolling Papers
Exact measurements and names vary from brand to brand, but here is a general guide to rolling paper sizes.
Single Wide: A popular size for a standard joint, usually around 70mm long by 34mm wide. Joints made with single wide papers can hold anywhere from .25 to .5 gram of flower.
1 ¼: This paper can hold about 25% more flower than a single wide, hence its name. It's among the most popular paper sizes.
1 ½: This paper can hold about 50% more flower than a single wide.
Double Wide: These papers are a bit longer than a single wide but much wider, meaning you can roll a big old fatty if you so choose.
King Size: This is the biggest "standard" size that you'll find in most smoke shops. These big guys can hold 1 to 2 grams of flower. Party time.
King Size Slim: These papers are similar in length to king size, but they are narrower. Less paper makes them more challenging to roll, but the payoff is a slower burn and better smoke.
Filters or Crutches
A filter (aka a crutch) is a small piece of cardboard or paper that you place at the mouth end of your joint.
They provide stability at the most fragile end of your joint, while also keeping burned flower and ash out of your mouth when you inhale. Plus, they give you something to hold so you can smoke all of the weed in your joint without burning your fingers.
You can buy these, or make your own. (Keep reading to learn how.)
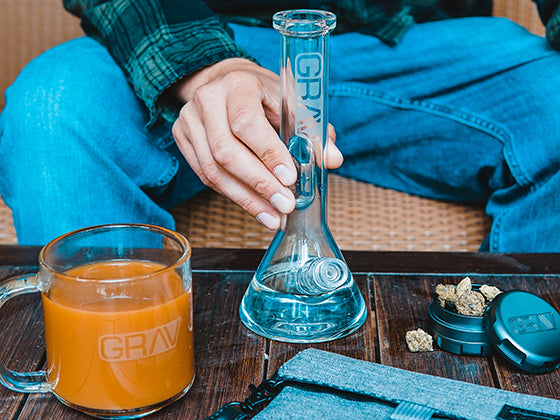
A Rolling Tray (Optional)
We want tidy joints, but the process can be messy. A rolling tray gives you a flat surface to set your nugs and catch any dropped flower while you work.
A melamine tray like the GRAV® Rolling Tray is durable and easy to clean. And the GRAV® Rolling Tray with Magnetic Lid has a convenient top to keep your supplies tidy and dust-free in between rolling sessions.

A Skinny Wood Skewer (Optional)
This little tool will help you close up the end of your joint and create a channel for your smoke. Keep reading to find out how.
Step-By-Step Joint Rolling Guide
1. Gather Your Gear & Grind Your Weed
Gather everything you'll need and set it all out on or near your rolling tray:
- Your preferred cannabis strain
- Rolling papers
- Pre-made filter/crutch or bit of cardstock to make your own
- Grinder
- Skewer (optional)
Once you have all your supplies, it's time to grind.
Break your nugs of cannabis flower into small enough pieces to fit into the grinder. Place your weed among the teeth in the grinder, but leave some room to spare. Better to grind in batches than over-pack your grinder.
Screw the lid onto your cannabis grinder. Then rotate the top and middle sections of your grinder in opposite directions a few times to break up the weed. As the pieces get smaller enough, they'll fall through the holes and into the bottom chamber.
2. Create Your Crutch
If you're using a pre-made filter tip, you can skip this step.
To make a DIY crutch, you'll need a small rectangle of stiff paper like an index card or cardstock. Cut your paper to 0.5-1" wide and 2-3" long.
Starting at one of the narrow ends, fold the paper back and forth in a zig-zag pattern a few times. Then wind the remaining paper around the folds. You'll end up with a little cylinder with the zig-zagged paper inside.
3. Fill and Shape the Joint
Hold your rolling paper in one hand with the gum side facing up.
Distribute your ground flower evenly along the crease in the paper.
Place your filter or crutch at one end of the paper, next to the weed. It should be entirely on the paper, not sticking out at the end. And make sure it's right up against your flower, with no space in between.
Pinch the paper between your thumbs and index fingers and use a tuck-and-roll motion: push the near edge of the paper up and over the weed with your thumbs, while your fingers guide the shape from behind. Work back and forth along the length of the joint to distribute the flower evenly and build a modest cone shape—narrow at the filter end, a little wider at the lighting end.
As you pinch and shape your joint, keep the paper tight around your filter so it doesn't fall out when you smoke.
Once you have a satisfying cone shape, completely roll the joint, tucking the unglued edge into the roll.
4. Seal the Joint
Lick the glued side of your paper and press it against the joint to seal. Start securing the glued paper at the filter to keep it tight, and work your way down to the cone end (but don't seal the cone end yet).
5. Tap & Pack
Next, we have to make sure that your joint is well-packed.
With the wide end still open, gently tap the filter end of your joint on a table a few times to help the weed settle. Then lightly tamp down the flower at the open cone end with your skewer.
6. Seal It Up
To seal the joint, use your skewer to fold the open cone ends down, tucking them flat against the flower for a blunt end. You can also just twist the open ends tightly into a little tail that will burn off when you light up.
7. Bonus Tip: Make a Smoke Channel
This is one of the best joint rolling techniques you may have never heard of.
After sealing your joint, poke your narrow skewer into the joint at the cone end. Slowly push the skewer into the joint while twisting it gently, until you reach the filter.
This creates a smoke channel through your entire joint for perfect airflow every time.

Troubleshooting Your Joints
Uneven Rolls
This is usually a grind or a flower distribution problem.
A fine, consistent grind from a quality grinder will help. Then, make sure you're spreading your weed evenly along the length of the paper before you begin rolling. If you don't, you'll have lumpy and loose spots in your joint.
Canoeing
Canoeing is when fire spreads down one side of your joint and not the other. It hollows out only one side of the joint, making it resemble a canoe. It's a huge bummer and can ruin your smoking experience.
The culprits can be pockets of air in the joint, low-quality paper that burns too quickly, or hitting the joint too hard.
To avoid canoeing, distribute your flower evenly when rolling, and don't skip the packing step.
Slow-burning papers will also help. Thicker papers are easier to roll, but they also burn more quickly. So look for the thinnest papers that you can roll well at your particular skill level.
And if you're mid-session and the canoeing begins, lick a finger and wet the area that's burning too fast to slow it down.
Trouble Sealing Your Joint
This is usually a case of overstuffing too much cannabis flower into your joint. Use the right paper size for the amount of weed you're adding. And remember, you can always save the extra for your next joint.
Lighting Your Joint
Even if you do everything right when rolling a joint, improper lighting can still cause canoeing. To get an even burn, follow these tips.
Before the joint hits your mouth:
Fire up your lighter and bring the joint end to the very edge of the flame while rotating the joint for an even light. Do this until the tip of the joint is completely lit.
Bring the joint to your mouth:
Take a few short, gentle puffs while twisting the joint to get it burning evenly. Then, you can slowly inhale into your lungs. You don't have to suck like you're drinking a thick-ass milkshake! Gentle and slow is the way.
How to Roll a Cone
Cones have a filter tip and paper already assembled into that cone shape, making them easier to roll than joints.
To start, remove the packing straw from inside your cone and grind your flower to an even consistency.
Hold the cone at the filter end, and fill about a third of the way with ground flower. Then tamp it down gently with the packing straw.
Continue to fill the cone, lightly packing as you go. Leave a small gap at the top.
Fold the open ends down (or twist), just like sealing a regular joint.
GRAV's Quartz Tip Cones are easy to pack and delightful to smoke. A paper filter is nestled inside a premium quartz tip. This keeps ash at bay and gives you a smooth, cool smoke to the very end. No soggy tips, no burned fingers.
Choose from Tall Kings or Short Kings, in undyed or soy-dyed black paper.


Advanced Rolling Techniques
As you get more adept at rolling joints, why not stretch your skills with some challenging shapes?
A cross joint is just what it sounds like—two joints with one inserted horizontally through the other, creating a T or cross shape. You can light all three ends of this monster.
The Popeye is a joint that actually looks like the sailor man's corn-cob pipe. It has a big upright bell end packed with weed. A tough roll, and not for the faint of heart.
(Fun side note: apparently, "spinach" was common slang for weed back in the 1920s and 1930s. Add to that the silly reefer madness-esque idea that cannabis turned people into violent lunatics, and it makes you think maybe Popeye's spinach habit was really a metaphor for something else?)
Then there's the braided joint, which is three (or more) long joints plaited into a braid. The trick is to fill your joints a bit on the loose side so they're pliable enough to braid.
Puff Puff Practice
Mastering the art of rolling a joint takes time and practice. Fortunately, at the end of each practice session, there's a joint waiting for you. And if it's a total disaster? Break it open and pack a bowl instead. You can try again tomorrow. Soon, you'll be a human rolling machine.
The right tools and accessories make rolling a joint a little easier, from precision grinders to rolling trays to cones. Explore GRAV's premium rolling tools to elevate your joint game.
Contributed by Kate McDermott